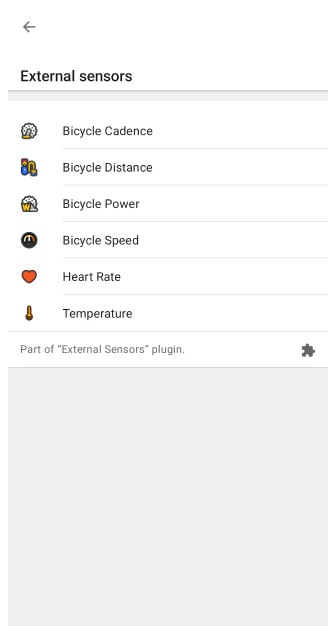
External Sensors
Overview
The External Sensors plugin is a paid feature.
The External Sensors plugin allows you to read and record data from wireless external sensors running on ANT+ and BLE (Bluetooth Low Energy) technologies and display this data using widgets in the OsmAnd application. This managed network is capable of collecting, transmitting, and storing sensor data.
NOTE: iPhones and iPads do not support ANT+ due to hardware limitations.
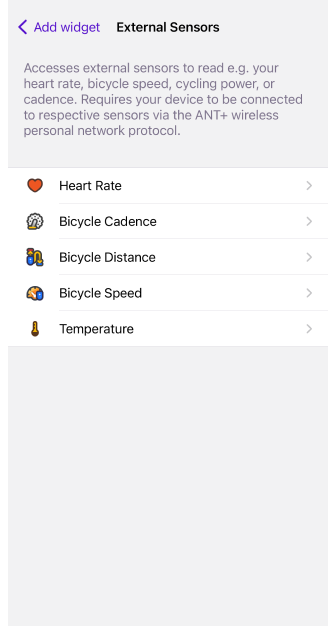
The External Sensors plugin accesses external sensors and can read data such as:
- Heart Rate
- Bicycle Power
- Bicycle Cadence
- Bicycle Speed
- Bicycle Distance
- Temperature
To use the plugin, ensure your device is compatible, the plugin is enabled, and your external sensors are connected via Bluetooth (BLE).
Required Setup Parameters�
To start using data from external sensors, follow these steps:
- Purchase an OsmAnd Pro subscription to unlock the External Sensors plugin.
- Enable the plugin in Menu → Plugins.
- Turn on Bluetooth on your device to allow connection with BLE sensors.
- Pair and configure external sensors through the plugin menu.
- (Optional) Add External Sensors widgets to your map screen to display real-time data such as heart rate, cadence, or battery level.
- (Optional) Use the Trip recording plugin to record sensor data into GPX tracks.
- (Optional, Android only) Follow these tips to connect ANT+ sensors if your device supports them.
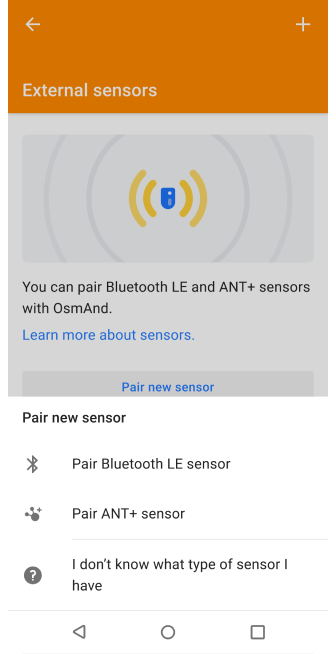
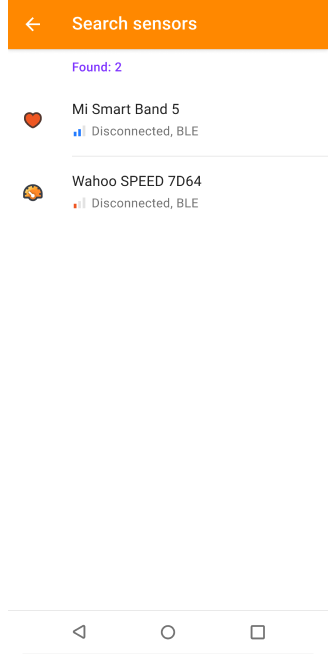
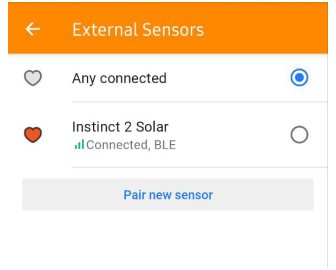
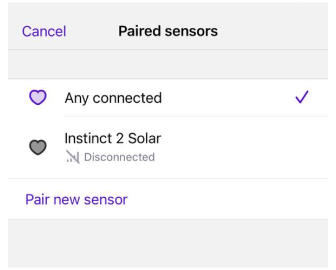
Pair New Sensor
- Android
- iOS
 |  |
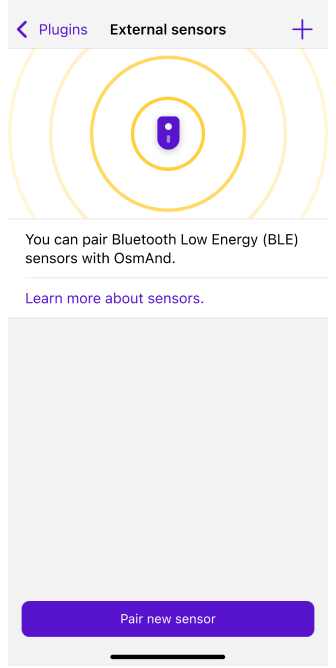 |  |
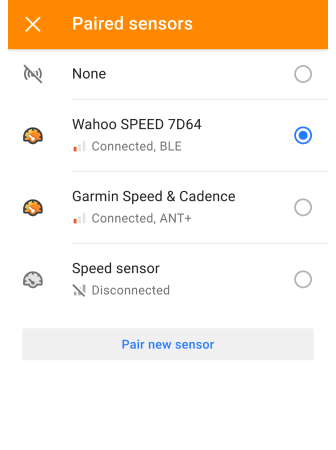
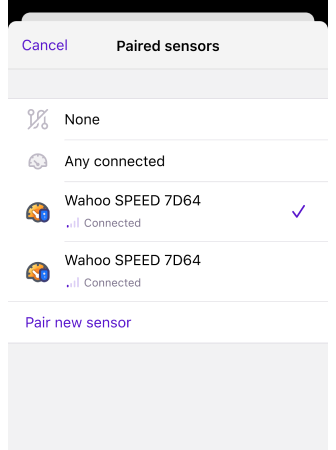
To pair a new sensor, follow these steps:
- Make sure Bluetooth is enabled on your device.
- Go to Menu → Plugins → External Sensors → Settings.
- Tap Pair new sensor.
- OsmAnd will scan for available Bluetooth LE or ANT+ sensors (depending on your platform).
- Tap the + button next to the sensor you want to pair.
- Once connected, the sensor will appear in the list of Connected devices.
Notes:
- On iOS, only Bluetooth Low Energy (BLE) sensors are supported due to hardware limitations. ANT+ sensors are not available.
- On Android, both BLE and ANT+ sensors may be supported depending on your device. See ANT+ compatibility guide for more details.
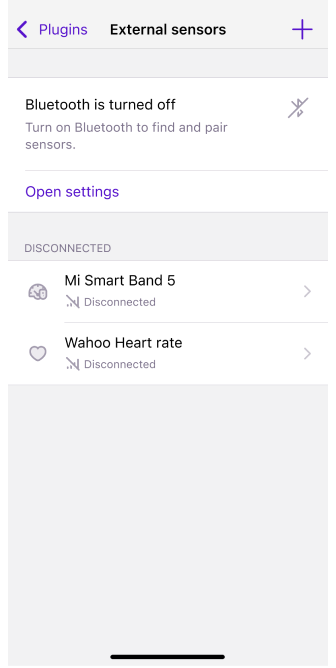
- A pop-up notification will appear each time a sensor connects or disconnects.
- Bicycle power sensors are available only on Android via ANT+.
Sensor Settings
- Android
- iOS
Use one of the following paths to open the sensor settings:
- Menu → Plugins → External Sensors → Available device → Settings
- Menu → Configure profile → Plugin settings → External Sensors → Available device → Settings
Use one of the following paths to open the sensor settings:
- Menu → Plugins → External Sensors
- Menu → Settings → Selected profile → Plugins → External Sensors
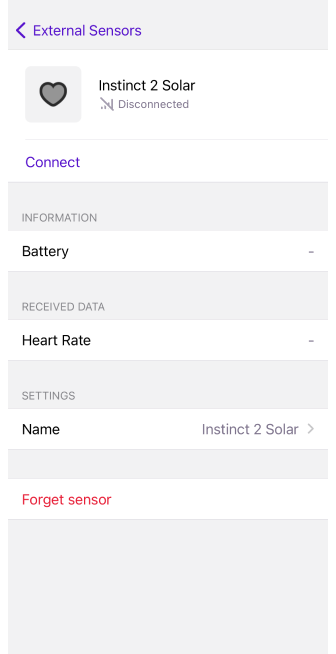
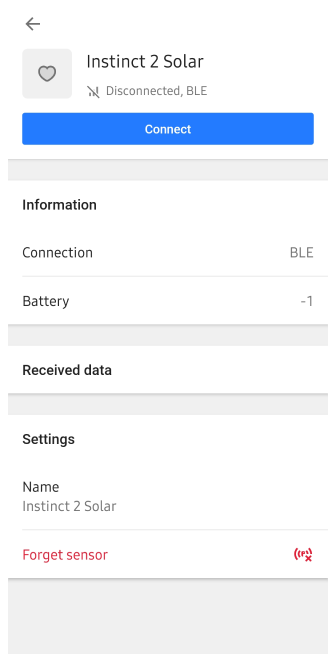
Each paired external sensor listed in OsmAnd has its own configuration screen with the following options:
- Connect / Disconnect – toggle the connection state.
- Rename – assign a custom name to the sensor.
- Forget sensor – remove the sensor from the list (can be re-paired later).
- Settings – open the sensor details screen (sensor type, values, battery level, wheel circumference setting).
Notes:
- On iOS, you can display the battery level of connected BLE sensors directly in a map widget. To enable this, go to: Menu → Configure screen → Choose panel → Add widget → External sensor → Settings → Show → Battery level
- A pop-up notification appears when the battery level of a paired sensor drops below 15%.
Trip Recording
- Android
- iOS
Go to: Menu → Plugins → Trip recording → Settings → Data → External sensors
Go to: Menu → Plugins → Trip recording → Settings → External
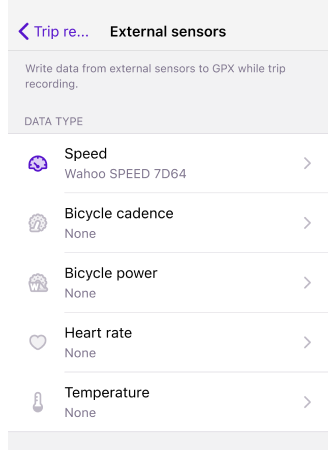
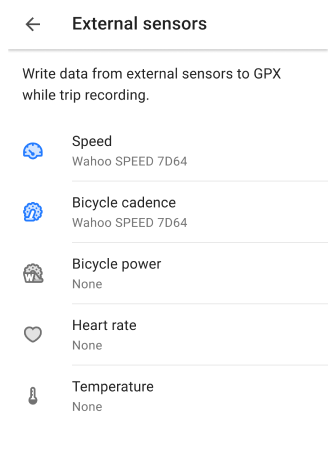
To record sensor data using the Trip recording plugin during your trip:
- Make sure the External Sensors plugin is enabled.
- Go to Menu → Plugins → Trip recording → Settings → Data → External sensors.
- Select the sensor types you want to record (e.g. cadence, heart rate, speed).
- Start recording your trip. OsmAnd will save selected sensor data into the GPX track.
Notes:
- The list of available sensor types is shown even if no sensors are connected.
- If no sensors are paired yet, use the Pair new sensor button in the plugins settings.
- Battery level data is not recorded into GPX files and is not available for analysis on the map.
OsmAnd uses track recording to embed sensor data into GPX files. This format is compatible with many sports and training apps (e.g. Strava, Runkeeper).
Data Analyze
- Android
- iOS
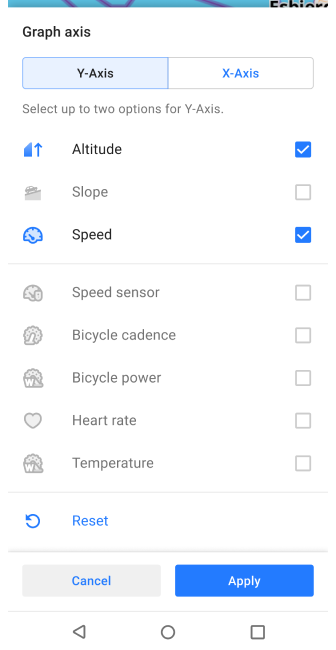
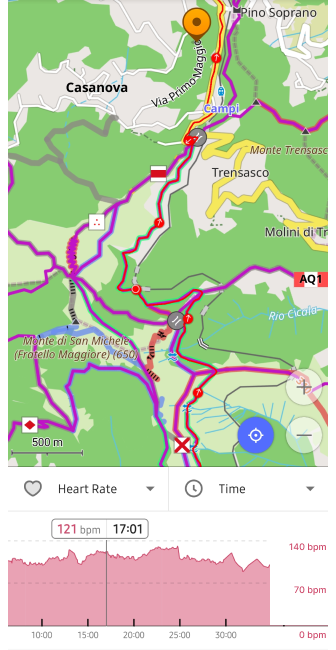
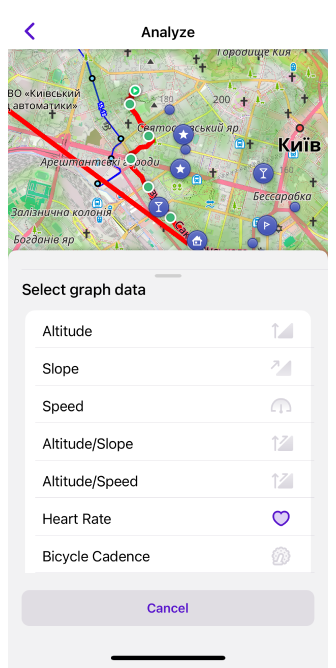
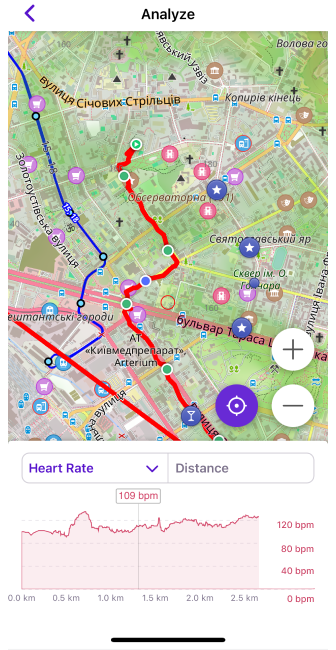
After recording your trip using the Trip recording plugin, you can review sensor data in the track analysis interface.
To analyze data:
- Finish your trip recording.
- Open the recorded track from My Places → Tracks or tap the track on map.
- Select Options → Analyze on map from the track context menu.
This will display graphs for your recorded data: Heart rate, Speed, Cadence, Bicycle power, and Temperature
Battery level and Distance are not available in the Analyze on map feature.
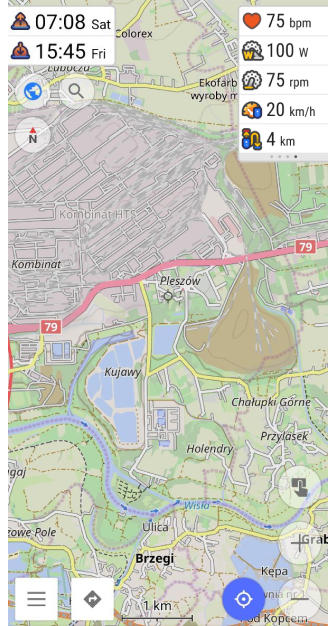
Widgets
- Android
- iOS
Go to: Menu → Configure screen → Widgets → Choose a panel → Add widget → External sensors
Go to: Menu → Configure screen → Widgets → Choose a panel → Add widget → External Sensors

The External Sensors widget allows you to display live data from your connected sensors directly on the map screen.
Before starting your trip:
- Make sure that the External Sensors plugin is enabled.
- Open Configure screen and add the necessary widgets to the appropriate panel.
Supported widget types:
- Heart Rate – displays real-time heart rate from a paired monitor.
- Bicycle Power (Android only) – shows current pedaling power in watts.
- Bicycle Cadence – shows the number of pedal revolutions per minute.
- Bicycle Speed – current cycling speed.
- Bicycle Distance – total distance measured by the sensor.
- Temperature – current ambient temperature.
- Battery Level – percentage of battery remaining in a connected BLE sensor, switch it in Sensor settings.
Note: If a sensor temporarily disconnects, tap its widget on the map to immediately attempt reconnection — no need to open the External Sensors menu.
Widget Settings
- Android
- iOS
Go to: Menu → Configure screen → Widgets → Choose a panel → Add widget → External sensors → Choose a widget → Settings
Go to: Menu → Configure screen → Widgets → Choose a panel → Add widget → External sensor → Choose a widget → Settings
By default, the widget shows the first currently connected sensor of this type. If you want to use a specific sensor, tap Source of data and choose from the list of connected sensors.
On iOS, you can choose what value to display in the widget:
- Sensor data (e.g. cadence, speed).
- Battery level – real-time battery percentage of the selected sensor.
This is useful when you want to monitor the battery charge during long trips to avoid disconnections.